
Introduction
When slicing a 3D print, one of the most important parameters that should be taken into consideration is your infill pattern. It affects strength, print time, material usage, and even aesthetics. Although infill is such an important setting to get right, most people stick with whatever their slicer defaults to without a second thought. Here’s a breakdown of the key patterns and when to use each one.
Infill Patterns
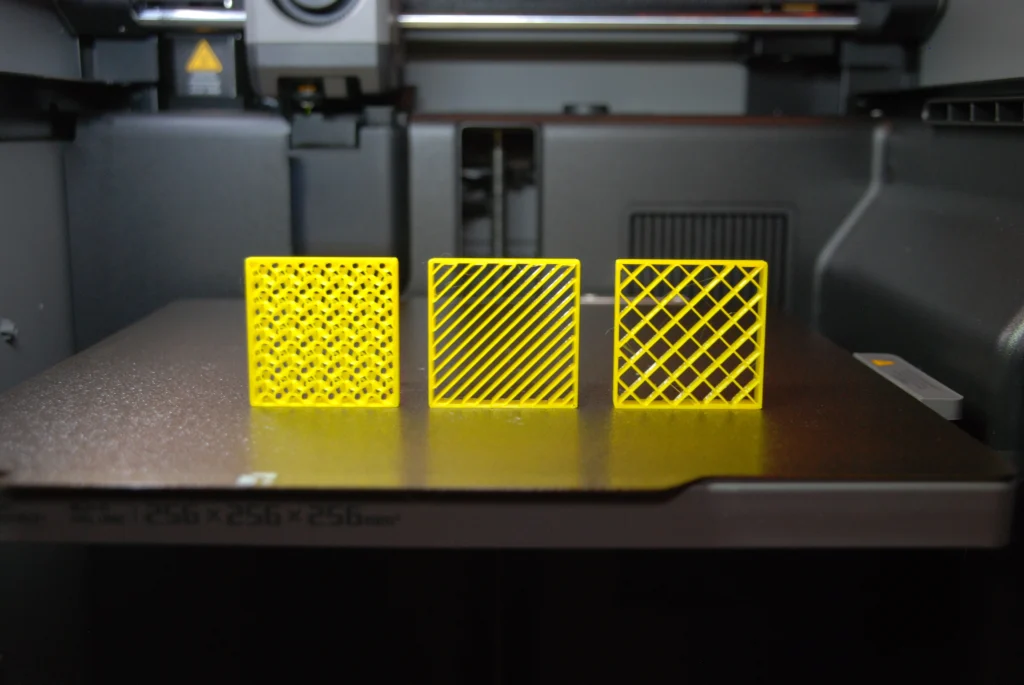
Grid is the most common infill pattern and the default in many slicers, and for good reason. It prints in two perpendicular directions, creating a simple crosshatch structure that offers a solid balance of strength, speed, and material efficiency. It’s not the strongest option available, but for the vast majority of everyday prints it does the job reliably without overthinking it.
Gyroid is arguably the most impressive infill pattern available to FDM printers. Its continuously curving, wave-like structure means it is isotropic (it offers equal strength in all directions) making it the go-to choice for any part that needs to handle stress from multiple angles. It also performs particularly well with flexible filaments like TPU. It’s worth noting that cubic infill is also isotropic, and while it prints faster than gyroid, it doesn’t quite match it for strength. If maximum performance is the priority, gyroid wins.
Lightning infill is the opposite end of the spectrum. Rather than building a structural internal lattice, it generates only the minimal branching structure needed to support the top surface of your print from collapsing. It uses very little material, prints quickly, and is completely unsuitable for anything load-bearing. Where it shines is purely decorative prints like vases, figurines, visual models, etc where you just need the walls to hold their shape and nothing more.
Aligned rectilinear is a pattern that doesn’t get talked about enough, but it’s incredibly useful for a specific use case: transparent or translucent prints. Unlike grid, which crosses its lines and creates visual interference, aligned rectilinear runs all lines in a single parallel direction. This allows light to pass through the part much more uniformly, resulting in a far cleaner, more consistent optical appearance. If you’re printing in clear PETG or any translucent filament and want the best visual result, this is the pattern to reach for.
It’s worth acknowledging that most slicers offer far more infill patterns than the four covered here. For example, honeycomb, cubic, hilbert curve, concentric, line, and many more depending on which software you’re using. The reason this post focuses on these four specifically is that they each represent a distinct and practical use case: grid for general purpose printing, gyroid for strength, lightning for speed and material saving, and aligned rectilinear for optical clarity. Many of the other patterns occupy a middle ground, they may perform well in specific tests but don’t offer a compelling reason to reach for them over the options above in day-to-day printing. Rather than cataloguing every pattern available, the goal here is to give you a clear mental model for making a confident decision quickly.
In adition to this...
Infill percentage determines how densely the chosen pattern fills the interior of your print, expressed as a percentage from 0% (hollow) to 100% (solid). It has a direct impact on strength, weight, print time, and material use, but the relationship isn’t always linear. For example, jumping from 20% to 40% won’t double your strength, but it will noticeably increase print time and filament consumption. For most functional parts, somewhere between 15–25% is sufficient. It’s also worth noting that pattern and percentage work together: a 20% gyroid will often outperform a 40% grid in real-world loading conditions, so it’s always worth considering both variables rather than just cranking the percentage up.
Infill as a design feature is something that often gets overlooked but opens up some genuinely interesting creative possibilities. By removing top and bottom layers in your slicer, the infill pattern becomes the visible surface of your print. Gyroid produces a striking organic texture, grid gives a clean geometric look, and concentric patterns can create an almost topographic effect. Combined with a considered choice of filament colour and finish, visible infill can elevate a print from functional object to something that looks intentionally designed. It’s a simple trick worth experimenting with.

WRITTEN BY OLIVER ROTHNER
Award-winning product designer and engineer.
Currently working as Project Manager at Pro2Pro whilst obtaining further qualifications.