Introduction
Not every print is a showpiece or some complex prototype. Sometimes the most useful thing a 3D printer can do is quietly solve a problem that would otherwise cost you time, money, or a trip. This use for 3D printing has been on the rise as 3D printers become more accessible to hobbyists and the general public.
An Example
About 6 months ago, the plug/ hangar that the parcel shelf string attaches to in order to lift up and down in my car went missing. Because of this, opening the boot with only one of these plugs would make the parcel shelf become unstable and fall out of place. This has led to me completely disconnecting both sides meaning the parcel shelf no longer lifts or drops with the boot, a simple and small problem that slowly gets on your nerves as time progresses.
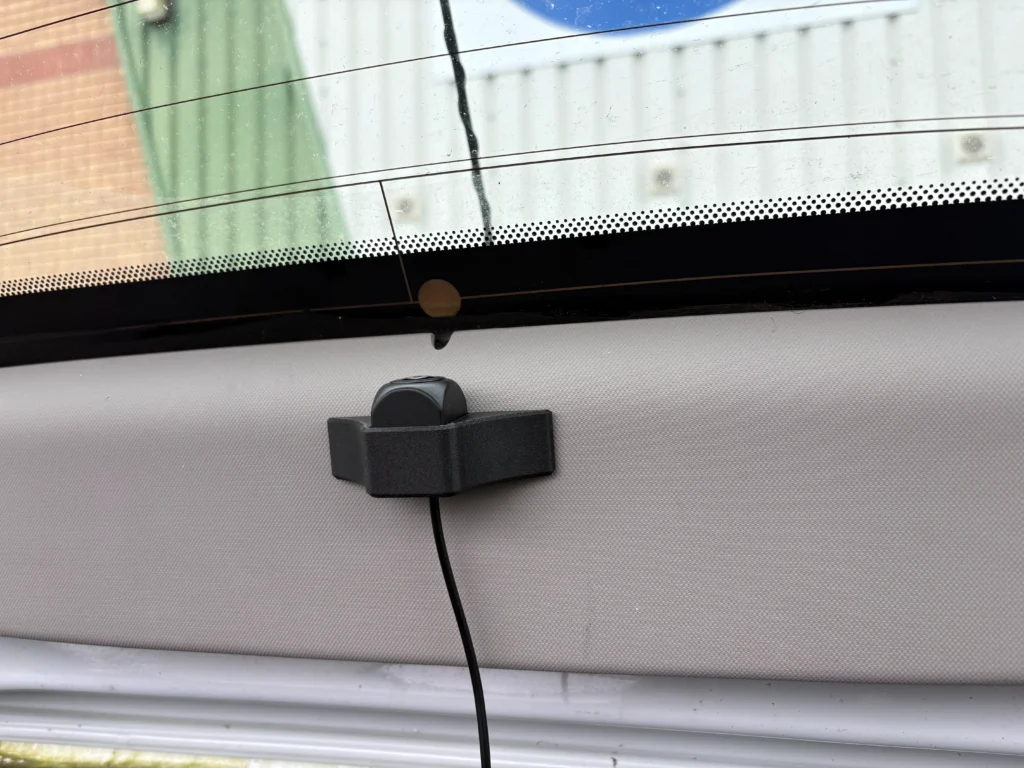
I also have a dashcam fitted that has a rear facing camera. This camera utilises a mount made from bent sheet metal and is mounted using screws at two points. Unfortunately, not only is this very ugly, it also means that the angle of the camera is constantly being thrown off from bumps and vibrations whilst driving. The mount also has a relatively small surface area meaning that not a lot of adhesive tape can be used and therefore it frequently falls off.
Both parts are small and seem insignificant until they fail, then they seem like an unrecognised luxury that isn’t as easy to replace as just popping to the shop and buying a new one.
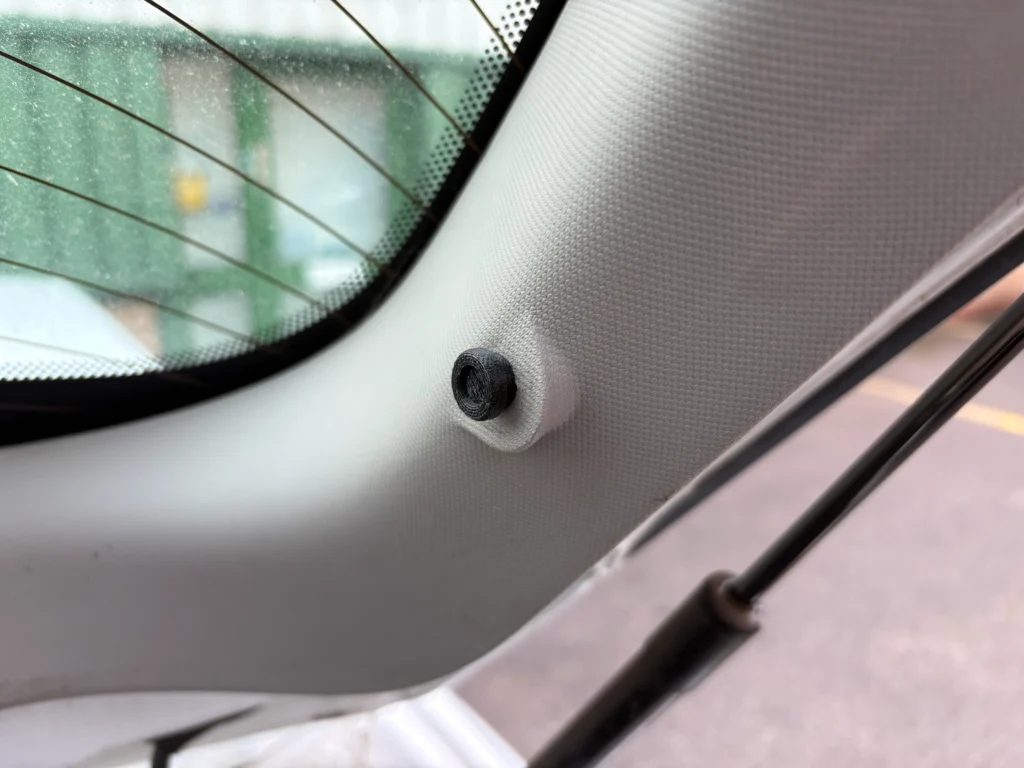
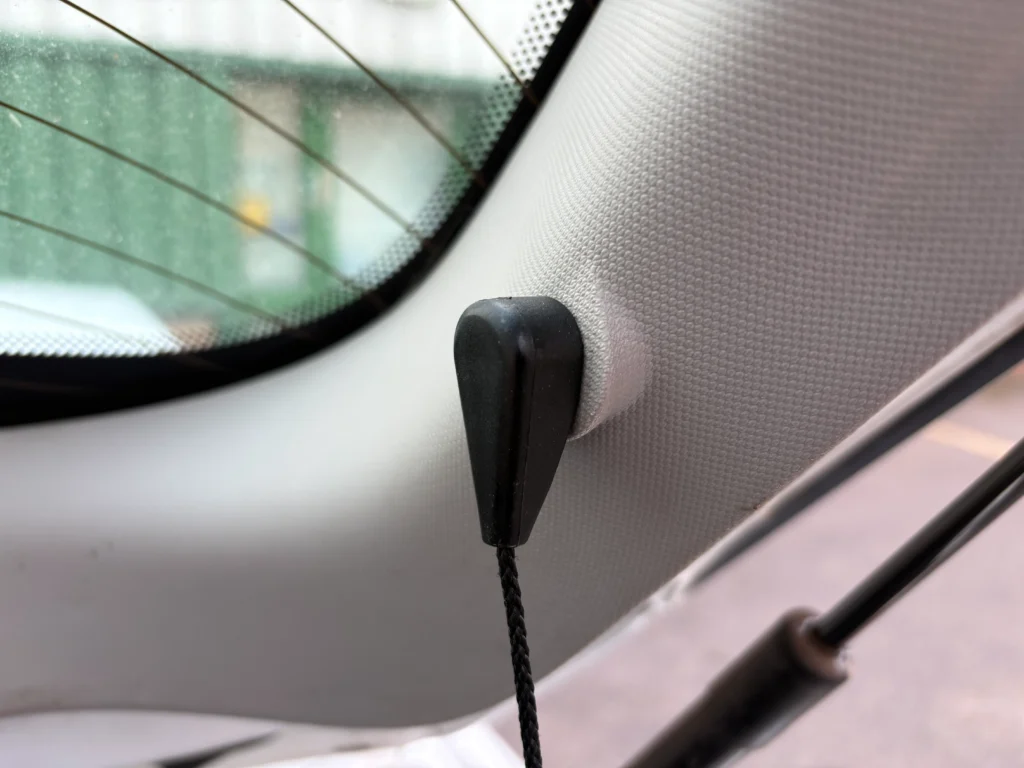
Parcel Shelf Plug
The parcel shelf is suspended by two small strings that hook onto a moulded plug on either side of the boot. One of mine had sheared off, leaving the shelf to droop on one side.
After months of this, I decided I was going to do something about it, looking online it could cost up to $5 per plug so this was not an option for me. As I still had one of the plugs so I decided to replicate this. All I needed to do was take some basic measurements – diameters, depths, thicknesses – and then recreate this in fusion. I then added radius’s and slight tapers to many of the interfacing faces so that it all slot into place seamlessly.
This print took less then 15 minutes and fit perfectly the first time, no need for further iterations. There is no wobble as I kept the tolerances very low as this part must be able to support some weight without dislodging.
Rear Dashcam Mount
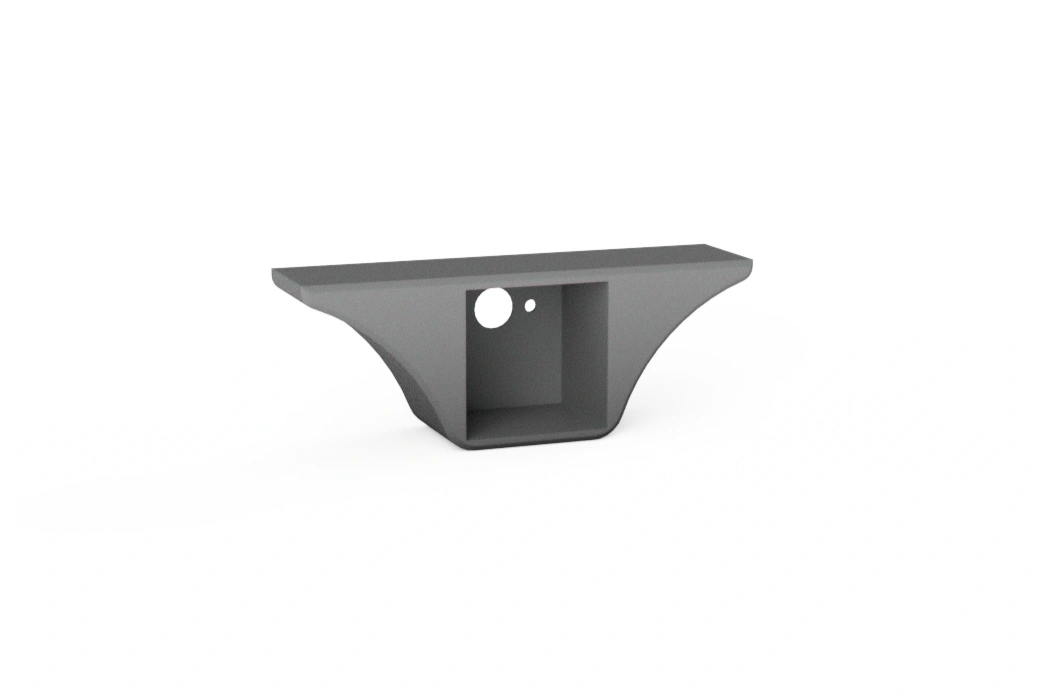
As mentioned above, the dashcam is mounted using a simple sheet metal mount that frequently falls off and/ or becomes misaligned easily during normal use.
I decided that rather than replacing the adhesive tape and tightening the pivot screws regularly, I would remove the stock mount and replace it with one I designed myself. I started by removing the dashcam and disassembling it to a point where only the parts I would be keeping were remaining. I then took measurements of the dashcam and transferred these into fusion. In fusion I then modelled up a simple but effective mount/ shroud that would encase the dashcam in a fixed position. I also extended the face that will be adhering the roof of the car to increase the surface area. This dashcam uses a wide-angled camera to ensure it captures as much of the rear view as possible, because of this, I designed the mount to stop about 5mm before the lens of the camera. This decision prevented the mount from blocking any of the cameras view.
As this would be a slightly larger print, I decided to crop the model down to its single features for testing. I then used PLA to quickly and easily print of each feature. This allowed me to test and iterate each feature individually. The benefit of this is that it takes less time and material to prototype as keeps the scope of the test on topic.
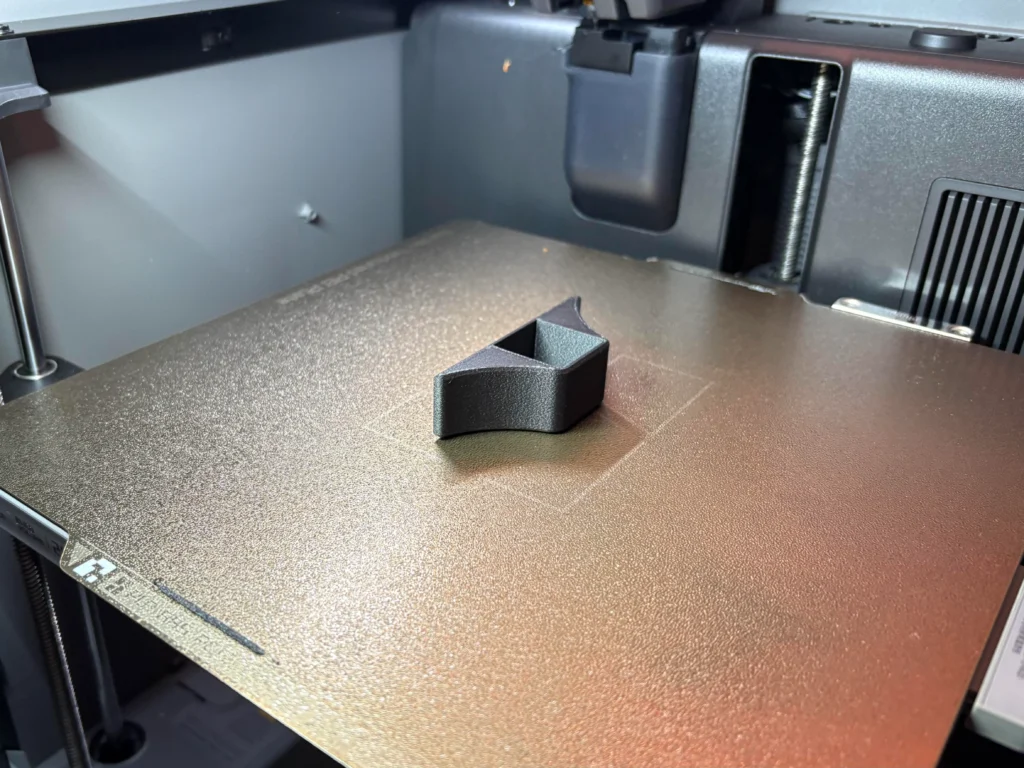
After a few iterations I had a design I was happy with. This design used friction to hold the camera in place. On top of this, I also repurposed the original mounting screws from the sheet metal bracket to create a strong and trustworthy join between the mount and the camera that could withstand the constant bumps and vibrations of driving.
In the end, this print only took about 45 minutes and fit perfectly due to the iterations carried out before. Again, there was also no wobble or need for re-adjustment due to the mount being in a fixed position and the repurposed screws holding the camera in place.
What Would I Do Without a Printer?
This is the question that doesn’t get asked enough. A 3D printer is easy to justify for elaborate projects, but value can be found in moments like these; small annoyances that would otherwise mean a compromise or an unnecessary expense.
With a 3D printer:
- Designed and printed in an under an hour
- Material cost: £0.20
- Exact fit. Measured to my specific car
- Choice of material for heat resistance and strength
- Easy to iterate if the first version is slightly off
- No need to source a whole assembly
Without a 3D printer:
- May need to live without a functioning parcel shelf or dashcam
- Buy the replacement part or the entire assembly at an inflated cost
- Rear dashcam and parcel shelf will be rendered null if not correctly angled
- Long waits for parts to arrive or be found
- Paying for more than you actually need
Neither of these were a dramatic fix. But that’s exactly the point, a 3D printer earns its place not just in big projects but in the short jobs that would otherwise drag on.
Material Considerations
When printing anything that lives in or on a car, material choice matters more than usual. Boot spaces and dashboards can reach high temperatures in summer, and will wear out under repeated stress cycles relatively quickly. For both parts I chose to use ABS-GF, it is rigid due to the glass fibres, ABS is heat resistant, it has improved fatigue resistance under repeated stress cycles and all round is much stronger compared to regular PLA.
Final Thoughts
Whilst this is not the reason I first go into 3D printing, it certainly has become a recurring theme. My quality of life has definitely been improved because of this without breaking the bank. Yes I had other options but none of them would be anywhere near as easy, fast and cost effective.
Both parts have been fitted for a while now with no issues. The parcel shelf sits level, the dashcam stays put, and both look like they’re meant to be there. Not every print needs to be impressive, sometimes it just needs to work.

WRITTEN BY OLIVER ROTHNER
Award-winning product designer and engineer.
Currently working as Project Manager at Pro2Pro whilst obtaining further qualifications.